How to connect the Pi Supply PoE HAT to the PiJuice
The PoE HAT allows you to power your Raspberry Pi using an Ethernet connection from your PoE compatible Ethernet switch. Combine this with the PiJuice and you have a complete power solution for you Raspberry Pi. The PoE HAT will not only provide a data connection but also power the Raspberry Pi and charge the PiJuice HAT. When the PoE power has been removed the PiJuice will then take over as a standard UPS. Follow the guide below to learn how to install the PoE HAT with the PiJuice.
What you need
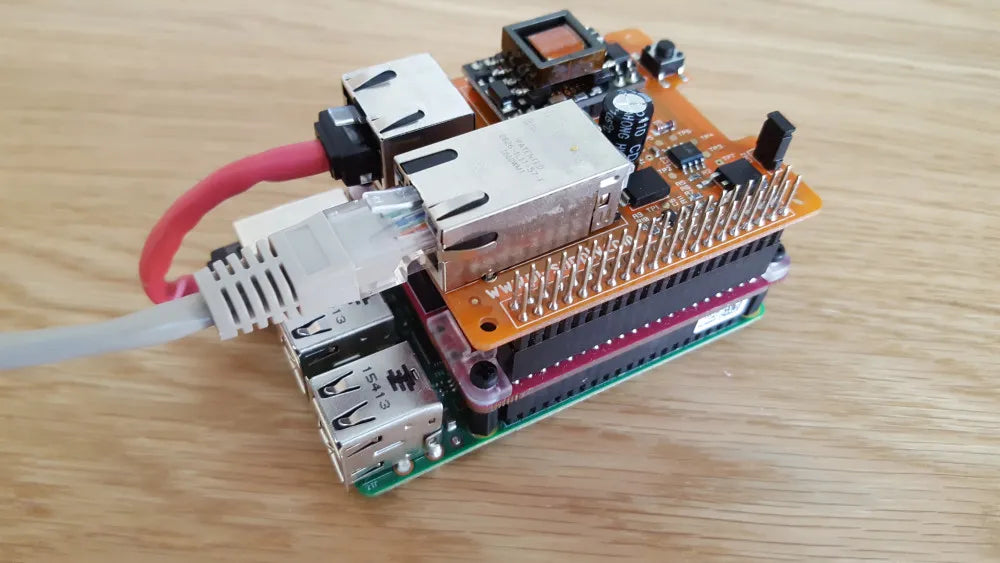
Step 1 – First, you will need to connect the PiJuice HAT to the Raspberry Pi. Make sure you insert the HAT and press firmly down on the GPIO connector on the Raspberry Pi. Once both boards a flush then you can screw the two board together using the provided stand offs and nylon screws.

Step 2 – Now insert the PoE HAT on top of the PiJuice. Make sure that the PoE HAT sits flush with the PiJuice by pushing down on the GPIO header.

Step 3 – Insert the small patch cable between the Raspberry Pi’s Ethernet port and the smallest Ethernet port on the PoE HAT.

Step 4 – Now connect the Ethernet cable from your compatible PoE Ethernet router to the PoE HAT.

Step 5 – Finally you can now provide power through the GPIO pins on the PoE HAT to power the Raspberry Pi and charge the PiJuice by pressing the small tactile button on the PoE HAT.